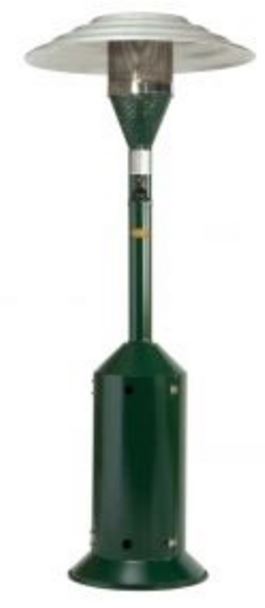
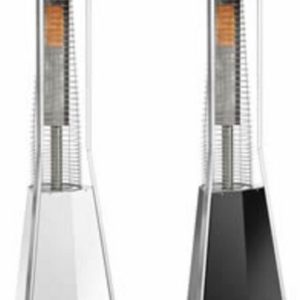
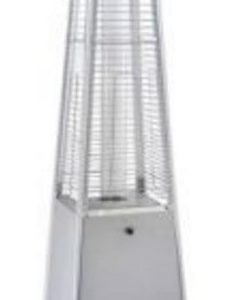
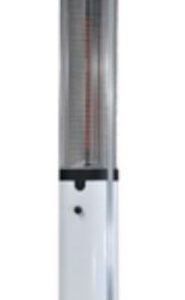
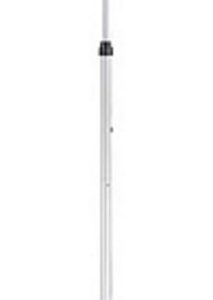
WARNING! For use outdoors in amply ventilated areas An amply ventilated area must have a minimum of 25% of the surface are open. (See below diagram). The surface area is the sum is the walls surface Never use in closed areas The use if this appliance in enclosed areas can be dangerous and is prohibited Use at a distance of at least 2m from inflammable materials Do not move when lit or just switched off Always wait until it is cool In windy conditions secure your heater to reduce the risk of the heater blowing over Operating instructions Please read these instructions carefully before use 1) Turn the lever on the clip on the regulator anti clockwise to open the gas valve on your patio gas cylinder 2) Press the control knob completely down, making sure that it is in the START position (white dote) 3) Press the electronic piezo until the pilot flame lights Once this is lit, continue to press the control know for another 10 – 20 seconds, the release it. Your pilot flame should now remain alight. If not, repeat steps 2 & 3 4) To light the main burner, depress the control knob halfway and turn anti clockwise to MIN or MAX 5) To put the unit in STANDBY, turn the control knob clockwise to the START position 6) To switch the heater off completely, turn the lever on the clip on the regulator clockwise to close the gas valve on the gas cylinder 7) Instructions for electronic ignition to replace battery, unscrew the black cover with the rubber button. (It will require a AA battery) 8) Do NOT operate if under the influence of alcohol or drugs. Description The use of this appliance in enclosed areas can be dangerous and is PROHIBITED The combustion products leaving the heater are very hot. On no account should the heater be used in an enclosed space Ensure that no flammable material is within 2 metres of the heater. Wide areas can be heated according to the thermal input and the atmosphere conditions prevailing at time use This heater does not expel exhaust gases, non-polluting liquid gas fuel is used (Propane) This unit has been approved by the German body TUV in Cologne and complies with current European directives and standards Safety devices installed on the unit Thermocouple The pilot flame heats an element that, when heated, keeps the gas valve of the heater open. (NOT THE ONE THAT IS ON THE CYLINDER) Within on minute of the pilot flame being extinguished, the gas supply is shut off to the heater control valve Piezoelectric Lighting Undoubtedly the safest method of lighting because no naked flame has to be approached by hand to the unit Anti-Tilt Switch If the heater is tilted past an angle of 10° from the vertical plain the gas supply to the heater control valve is shut off Safety rules to be observed The use of this unit in enclosed areas can be dangerous and is PROHIBITED Ensure the connection to the gas cylinder is secure and has been tightened with a spanner. Use ONLY for heating MAKE SURE that there is no inflammable material within 2m of the unit MAKE SURE that all other materials are more than 1m from the unit PAY ATTENTION to whatever may be above the unit when in operation, because:- – At 30 cm from the hood the temperature is 75°C – At 60 cm from the hood the temperature is 58°C – At 90 cm from the hood the temperature is 43°C WARNING!: Any flammable coating must be at least 1m from the top of the reflecting hood of the unit DO NOT TOUCH any part of the unit above the area of the control knob as this could be very hot Always wait at least an hour after switching off the unit completely before touching the parts above the control knob NEVER cover the apparatus whilst it is being used DO NOT START the unit if it is not completely assembled To balance the unit, use cylinders with an empty weight of not less than 11kg DO NOT USE the unit when there are strong winds NEVER move the unit when it is lit NEVER move the unit when it has just been switched off. Wait until it has cooled down and then move it Whenever the unit is not in use, move the cylinder from its compartment DO NOT replace the rubber gas pipe with other of more than 1.1m lengths ALWAYS turn the lever of your clip on regulator to the off position to close the valve on the gas cylinder CHECK the unit regularly when it is working DO NOT KEEP the cylinder of liquid in cellars, basements, stairwells, corridors, underground passages, etc. KEEP the cylinder away from heat sources A gas cylinder being in position inside the heater will not guarantee that the heater will not be blown over in windy conditions. Be aware! Operation Once the quick-on is correctly mounted on the valve, gas supply is possible by turning the regulator handle upwards (counter clockwise). To shut off the gas supply, reverse this procedure; an arrow engraved on the handle indicates the closing direction. Symbols engraved on the bonnet show how to operate the regulator handle CAUTION! If you are unable to open the regulator handle, this means that your Quick-on is not correctly connected to the valve. Do not force the handle open, start the procedure again Replacing a cylinder Make sure that: – All taps on the heater are in the closed position – The clip-on regulator handle is in the closed position Then remove the clip-on regulator by pressing horizontally on the handle and pulling upwards at the same time DO NOT attempt to carry out this operation with the regulator handle in the open position The clip on regulator can be equipped with a safety device designed to automatically limit the gas escape in case of separation or rupture of the pipe supplying gas to the consuming unit. The marking FLOW LIMITING DEVICE on the identification label means that the clip-on is equipped with this option Operating of flow limiting device The Flow Limiting Device is likely to activate under the following conditions: Normal operating conditions Consumption of the gas fired unit is higher than the regulator flow capacity. In such case, contact London Cool on 0121 359 5100 Operating your patio heater We recommend that the first time you use your patio heater, use in the open air as some fumes are given off due to the elimination of the protective lubricants Wait until the unit has cooled down before moving it to where it is going to be used 1) OPEN the valve on the patio gas cylinder by turning the lever on your clip on your regulator ANTI CLOCKWISE to the on position 2) Turn the CONTROL KNOB on the heater completely in a clockwise direction so that the white line points at the white dot. This is in the START position 3) Press and hold down the control knob, wait 40-50 seconds for the gas to fill the pipe, press the electronic piezo button to generate the spark to light your pilot flame. Check through the hole in the burner mesh that the pilot flame is alight 4) Wait a few seconds (10-20), then release the control knob If the pilot light goes out, repeat steps 3 and 4 Now the unit is ready to use. Gently push the control knob and turn it anti clockwise until the knob index corresponds with minimum or maximum according to the capacity required, and in a few minutes (3-5) you will have the heat you need. The models constructed by TMC are pre-set to function: 1) WHITE DOT – Start with only the pilot flame alight 2) SMALL WHITE FLAME – Minimum with the pilot flame alight and the main burner at minimum capacity 3) LARGE WHITE FLAME – Maximum with the pilot flame alight and the main burner at maximum capacity To bring the heater to Start position, turn the control knob clockwise as far as it will go Switching the unit off To switch the unit completely, turn the lever on the clip on the regulator clockwise to the off position. To make operations easier, use the MINIMUM and READY positions for the whole period of use, but make sure the cylinder and the heater are closed completely at the end of every use When not used for a long period The unit itself does not suffer under bad weather but we equally advise you to store it with care If there are problems of space, the reflecting hood can be removed, and the nuts and washers kept safe for future use. (NB: they are all in stainless steel) Remove the cylinder from its compartment, enclose the burner in a plastic bag and cover all the holes in the gas bottle compartment and door This will avoid the risk during the period of non-use (especially in the summer) of the heater being infested by spiders, wasps and other insects Such infestations will adversely affect your heater and are not covered under your warranty guarantee Restarting after a rest period Remove the reflecting hood and clean the underside until as white as possible Remove the burner mesh, clean inside and out with an ordinary cloth (DO NOT USE oily products that would produce fumes when the apparatus is next switched on) Clean around the burner ring and use a rag to remove any cobwebs and dust Re-assemble all the parts Check the rubber gas hose expiry date and replace if necessary with another Continue using the same instructions as above in the section OPERATING YOUR HEATER Maintenance and cleaning DO NOT clean the unit when it is lit or has only just been switched off Use a soft clean rag CHECK regularly that the RUBBER GAS HOSE connecting the regulator and tap CONTROL VALVE is in good order, otherwise replace it NEVER MAKE ANY MODIFICATIONS to the unit Eventual repairs must be made by specialised technicians and with original change parts AA BATTERY: The Electronic Piezo Igniter is equipped with one AA Battery and is not a part that is covered under warranty. A battery must be replaced NECESSARILY every year to avoid damage to the Electronic Piezo Ignition
Reviews
There are no reviews yet.